Modeling the Briny Deep

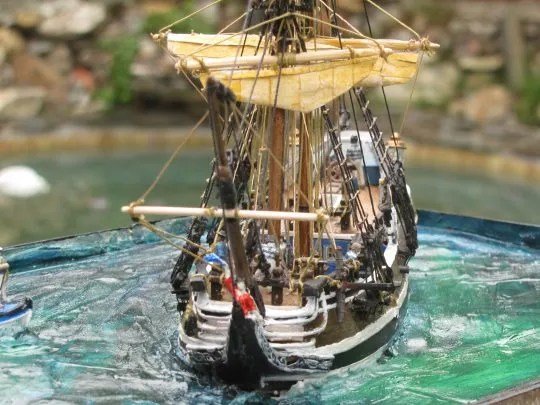
Replacing a mast led to replacing the deck, which led to removing the hull, which led to a plaster sea made from fence pickets and linoleum. Impatience is a powerful creative force.

Falcon plastic model pirate ship into something that was realistically scaled to both itself and other ships in her size. That was truly the intent.

Sadly, things got out of hand…

The Why

The entire adventure began with the goal to replace the grossly mis-scaled mainmast top. Wood seemed to be the obvious medium, as masts were, well, wood.

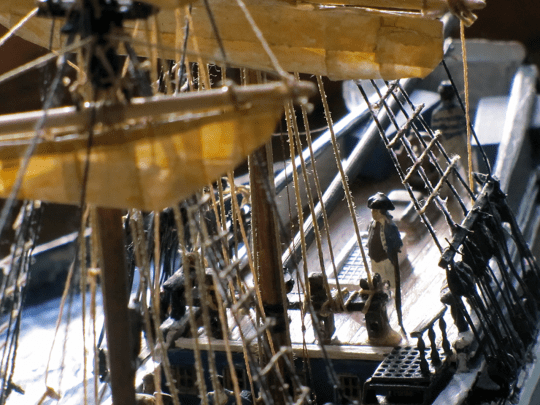
But sticking a correctly scaled wooden mast into that plastic planter box of a fixture seemed like a sin. So, out went the plastic decks, to be replaced with coffee stir sticks.

To facilitate the depth of the stir sticks, it became clear that the lower hull would have to go. My limited engineering skills and degree of patience couldn’t cope with the lovely, albeit shallow, slope of her bottom.

And that, dear friend, is how the Black Falcon came to be adrift in a wide wide wide wide sea.

The What

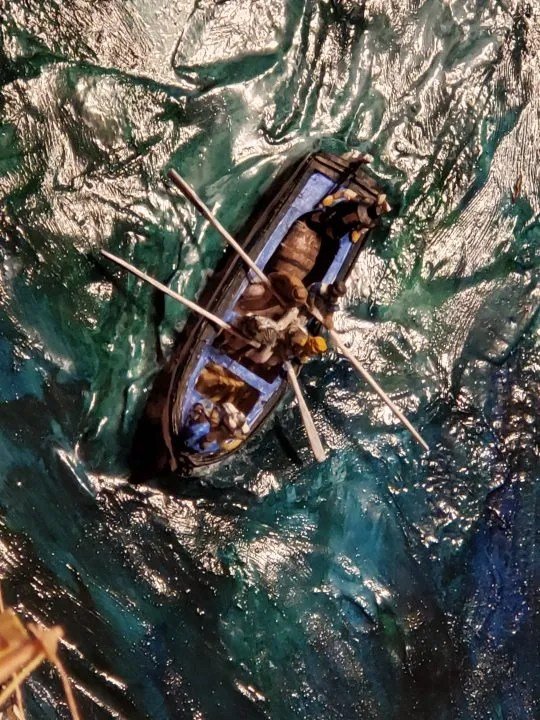
But, of what should the sea be made? Many modelers make their oceans out of colored resin, with white foamy waves and everything, and the results are breathtaking. But that takes planning, and patience, and chemicals I prefer not to inhale.

My brother is a model railroader from way back, and I, too, followed those rails for a time. Old habits die hard, and that made plaster the go-to medium.

Black Falcon sits on a flat piece of wood, bordered by strips of linoleum floor sample. As life is never simple, a piece of wood the appropriate size wasn’t available, so the flat piece is in fact three pieces of leftover picket fence pickets, screwed to another two pieces to keep them in place. The castoff linoleum hides the ugliness below. Trust me, it’s there.

Plaster of Paris is an aggravating substance. This is a known fact.

It’s liquid and watery for awhile, but turn your back to, say, do the dishes, and suddenly it’s solid like last week’s cheese. That I have no patience is, I believe, an established fact. I didn’t get along well with the Parisian substance.

Before it hardened completely, I shoved the Black Falcon in it to give her a place to sit in the plaster sea. While I provided the same service for the boat, the Black Falcon became hardened in place. Ack!

I used my fingers to add some wave troughs, but wasn’t terribly successful.

The Color

From Huazhuang, in Jiangsu Province, came a very nice, very inexpensive set of acrylic paints, packaged in tubes. Despite the $10 price tag from Amazon, they’re really a nice product. Much of the Black Falcon wears them proudly.

Because they’re in a tube, I thought I would be clever and smear some onto a paper plate, add some water, and then let the colors mix on the plaster sea.

Mistake.

Another thing about yeso de Paris is that it’s incredibly thirsty. There aint no mixing colors on the plaster. Instead, I got deep, dark pools of color, straight into plaster.

In plan B, I mixed the colors on the paper plate, and then brushed the mixture onto the plaster. I would have been easier had there not been a ship in the middle, but such is the price of impatience.

The challenge lay in brushing on the colors in one direction. The plaster gleefully soaked up whatever it could get, and holidays were so common it looked like August in Paris. You know, Europeans all go on holiday in August, and this is plaster of Paris…

As one color soaked in, another, lighter shade went on. The rule is to start with light colors first, but having the lighter shades on top seemed to make the color variation more subtle.

Sadly, there was just no way around the deep color holes I had made.

That’s when it seemed obvious that the Black Falcon lay in shallower water. Look, down there, do you see those shadows? Perhaps a rock, or a cavern, or some coral? Perhaps a kelp forest.

Raw titanium white is pushed right up against the hull. As I hadn’t finished detailing the hull before I stuck her into the sea, there are a number of crudities in her that wish had been fixed that now bear a splash of white that truly doesn’t help. Getting a skinny brush up under the boat’s oars was no picnic, either.

The white is brushed on the crests of the waves, such as they are, but feathered into the colors below so that it doesn’t show. I believe that’s called wasted effort…

The Shine

What is the surface of the sea if not reflective? In the case of a plaster ocean, it’s reflective with some fingerprints!

The original plan was to use Modge Podge, because it sets up quickly and dries clear. But, it’s not as clear as you’d think, and looks kind of flat in another harbor diorama. The smell is dreadful, the stuff is gross to work with, and doesn’t shine much. Out.

The surface of the Black Falcon’s sea is spar varnish. Fitting, eh mate? Spar varnish be the shiny stuff, do ye ken?

According to the instructions on the can, you’re supposed to lay down a coat, wait until it dries, sand it, and then lay down another. And that’s a great idea for those with patience and who work with a surface than can be sanded. As I had neither, I rather slopped on three or four coats just as soon as the previous coat seemed dry enough.

The extra coats gave a little depth, and blended the various colors together.

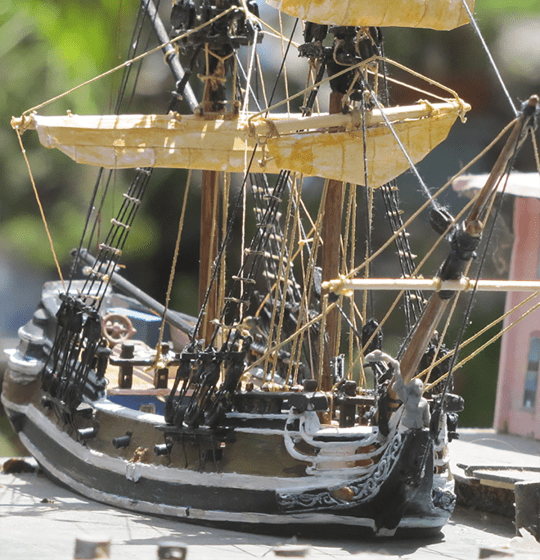
An overhead shot of the heavily modified Aurora Black Falcon ship, showing the popsicle-stick decks.

And so, what began as the modest ambition of replacing a mast top became, in the fullness of time and the fullness of impatience, a ship adrift in a plaster sea on a base of fence pickets, sailing nowhere in particular but looking rather well doing it. The Black Falcon is not finished. She may never be finished. There are futtock shrouds yet to rig, mysteries yet to solve, and things foolishly omitted that will continue to haunt the occasional sleepless hour.

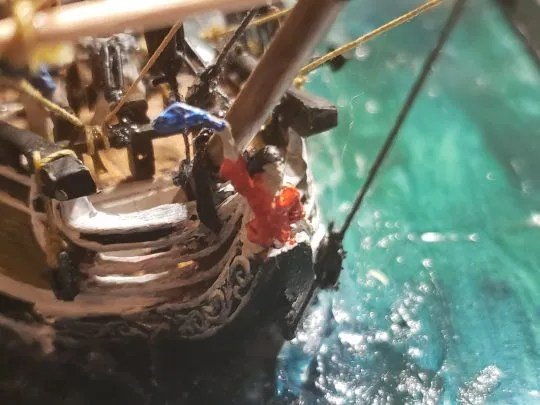
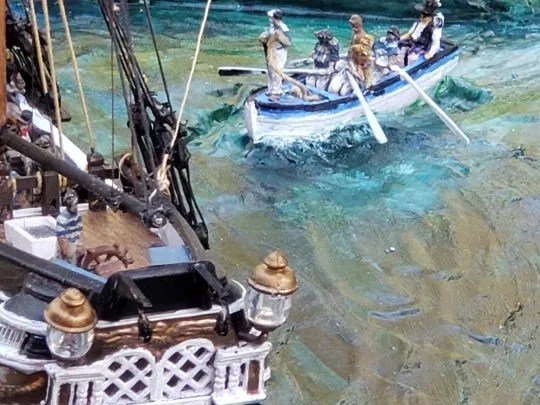
But she floats in her shallow tropical bay, her crew lounging on deck, her boat returning with a keg of whatever that island stream had to offer, and her figurehead waving cheerfully at nothing in particular.

For a terrible modeler with no patience and a romantic’s eye, that will do nicely. That’ll do, ship. That’ll do.

Developing Davits

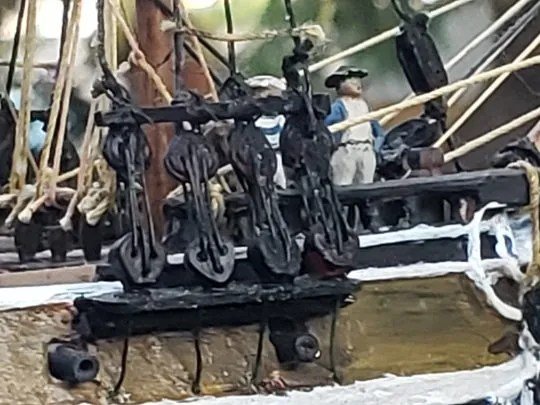
The davits are the last puzzle in the Black Falcon rework. They’re too close together, too short, and the tackle is missing. But they’re handsome pieces. Let’s not talk about the rest.

You may have seen my post about adding a different boat to the reworking of the Atlantis Black Falcon plastic model ship kit. The challenge lies in the size of the boat.

If you use the itty-bitty boat supplied in the kit (that’s it, just ahead of the boat with the crew in it), it fits aboard beautifully, but is laughably out of scale. The boat in the rework was kitbashed from boats from two other kits.  She looks to be of adequate size, but how to bring her aboard? And where to stow her?

Over the stern, of course! You can’t bring her inboard, and there be no law against hanging her outboard, is there now?

The two pieces that became the davits began life as supports for the mizzen chainwale of the ill-fated Soleil Royale. They were attached at one time, but somehow came off… it’s a long story.

Flipped 90 degrees, however, the length of the shorter arm almost exactly matches the height of the Black Falcon’s transom. And they’re handsome pieces – much better than what I was planning to fashion out of Popsicle sticks!

A piece of thin tan thread passes through the drilled-out hole in the block, supplied by the Soleil Royale, and ties in a simple knot on top. That simple knot is then tied against the bottom of the ersatz davit with another simple knot, this one on top of the davit so that the block is centered underneath.

They are too close together to accommodate the length of the boat, and are too short to keep her safely away from the stern windows when the wind blows, but let’s not talk about that. Neither should we talk about how difficult it must be to fish the boat lifts through those blocks, way out there at the ends of the davits. Nor shall we talk about where the tackle is to lift the boat. Duh. That’s what’s in those blue lockers!

The davits are the last puzzle to be solved in the reworking of the Black Falcon kit. There are no mysteries left to solve, beyond those things I foolishly omitted.

Tales of the Black Falcon is part of the John D Reinhart content family. Writer, illustrator, videographer, and accidental filmmaker — find the whole story at JohnDReinhart.com.

©2026 John D Reinhart/TalesOfTheBlackFalcon.com – all rights reserved

On Watering, Briefly

A ship thousands of miles from home with no drinking water had two options: find an island or die of thirst. Here’s how they got the water aboard — and what was probably in it.

Modern ships provide water for their crew by reclaiming used gray water. If that’s a new term to you, it’s easy: your sinks and shower produce gray water. Your toilet produces black water. No need to explain that further.

In the Black Falcon‘s day, not so much. Before she set sail on an ocean voyage, the ship’s purser, kind of the supplies manager, would purchase and have delivered massive kegs of drinking water. Well, sometimes they were massive, but other times the kegs might be the size of R2D2.

If the voyage was long, and sometimes a voyage could take many months, the water would run out. Or, more common, the water would turn green with algae, because water sanitation wasn’t a thing yet.

So, here would be a ship, thousands of miles from home, with no drinking water for the crew. They’ll go without food, but they won’t last without water.

The captain and the sailing master would pull out the charts and their experiences, and find an island, any island, that had a running stream on it. Even a spring would do.

They’d sail for the island, drop anchor as close to shore as they dared, and off into the longboat would go the ship’s cooper, an officer, and a number of sailors. All carried muskets and cutlasses, because one never knows into whom one will run on a tropical island. Could be savages, could be buccaneers, or even Navy men!

The cooper would bring along a bundle of barrel staves and iron hoops. While the officer and sailors were off looking for the stream, the cooper and his mate would use those parts to assemble a water barrel.

They’d fill the barrel with water from the stream, lug it down to the boat, and row it out to the ship.

The ship’s carpenter usually went along, too. He was looking for wood pieces that might be useful in making repairs.
If the island was uninhabited, the crew might be allowed ashore for a bit of R&R. If there were natives, the crew was usually kept aboard: no sense inviting trouble.

Getting the full barrels of water back aboard ship could be a challenge. Of course they were now extremely heavy, and it was difficult to lift them up and over the ship’s side.

In one method, and long rope was run from the main deck up to the main yard, through a block at the yard arm, and then down into the boat. A sling on the end of the rope held the barrel, and the sailors pulled on the rope to hoist the barrel out of the boat while an old fellow squeaked out a shanty with a fiddle to help them maintain a rhythm. Once above the side rail, other sailors would turn the yard to set the keg over the deck, and the first sailors would lower away – easy, now, boys…

Another, and my favorite, method was called parbuckling. Yes, parbuckling. Two ropes were tied off on the main deck, and then fed down over the side, around the barrel in a loop, and then ran back up to the deck. Sailors pulled on the ropes, closing the loops. As they pulled in the ropes, the barrel rolled up the side of the ship. Brilliant.

So, just a closing thought, but most often that water that came aboard from your typical tropical isle would have been none too clean, what with fish farts, monkey doo, and all other manner of things having been dropped in it. But, drink it the sailors did, and never wondered why some mates would spend the next few days not feeling quite themselves.

Tales of the Black Falcon is part of the John D Reinhart content family. Writer, illustrator, videographer, and accidental filmmaker — find the whole story at JohnDReinhart.com.

©2026 John D Reinhart/TalesOfTheBlackFalcon.com – all rights reserved

Make a Figurehead

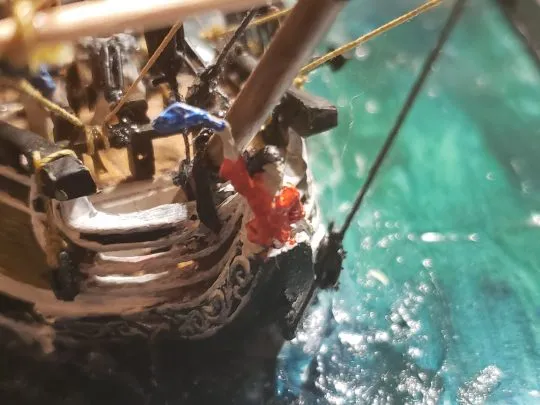
The Black Falcon’s original figurehead went missing. The Budget and Finance Committee made a replacement figurehead inadvisable. Woman Waving from the Orion Pirates set solved everything.

In reworking the Atlantis Black  Falcon  plastic model ship kit, I had thought about making her into the Kathryn B, the real hero of my novel The Diary of Phineas Caswell.

It’s vaguely ironic, because the Kathryn  B was based on the Black  Falcon,  so you sort of get this dog chasing its tail kind of a thing… anyway, not the point.

Back in Black Falcon’s day, sailors were most often a poor and illiterate lot.  These chaps routinely traded in their freedom and safety in exchange for a solid three square meals a day by signing up to serve on His or Her majesty’s royal naval vessels. And that was a very tough gig.

Because they couldn’t read, they could tell their ships in port by the figurehead. As often as not, the figurehead symbolized the ship’s name.

A colorful shot of the Black Falcon's figurehead

Not so the Black Falcon! If you were a teenage boy, the breasts on the naked figurehead were enough to make you shell out your $.98 in a hurry!

Oddly, the busty figurehead on my Black Falcon was missing… no further questions, your honor.

The real Kathryn B behind the ship’s name in the novel was fictitiously a character’s mother, but in real life is my wife, so the busty naked wench was out anyway.

A shot of the original Black Falcon's topless woman figurehead

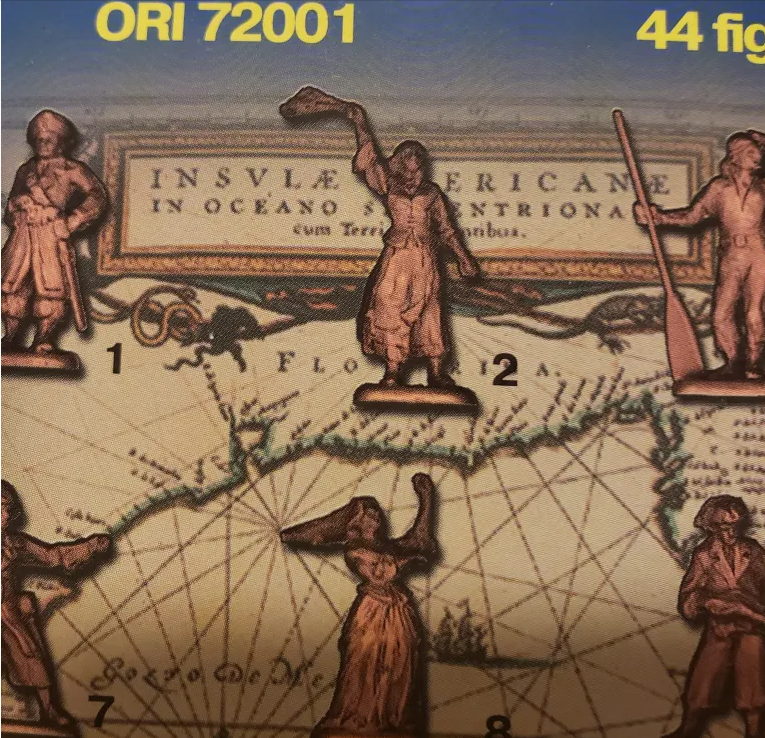
This girl came from a boxed set of English Pirates, Sea Warriors 18 Century from a Russian company called Orion. You get 44 folks in 22 different poses. Four of the 44 folks are actually a  pair of very nice cannons, and another two are scary skeletons.

But there are six women in the set, two each of three poses. You get “Pirat Woman,” brandishing a sword and a dagger, “Lady Resisting Pirat” – she accompanies a fellow called “Pirat Pulling Lady’s Hair,” and you get “Woman Waving.” They are very nicely sculpted, with to s of detail and animation.

I hacked Woman Waving in half at the waist and mounted her upper works onto the plinth abandoned by the busty wench. A little bit of Squadron putty faired her hair into the bowsprit support, and she was aboard!


Tales of the Black Falcon is part of the John D Reinhart content family. Writer, illustrator, videographer, and accidental filmmaker — find the whole story at JohnDReinhart.com.

©2026 John D Reinhart/talesoftheblackfalcon.com – all rights reserved

Simple Chain Wales

Chainwales kept the mast standing and gave Phineas Caswell his only refuge. Here’s what they are, why they matter, and how Popsicle sticks solved a problem the Soleil Royale couldn’t.

Chain whats? Chain wales, my friend. Although you’ll find many a seaside tourist trap hawking sailing ship models crafted by people who’ve never laid eyes upon a square rigged ship, or a ship, or quite probably the sea for that matter, featuring shrouds tied off straight to the hull, never since the year 1400 was there a masted sailing vessel that didn’t feature some degree of wale.

Ah, wales. Neither the country nor the seagoing mammals, wales, according to Chapman, are “the thickest strakes of wrought stuff in a vessel.” Thank you, Captain. That clears it up.

The outside of a ship’s hull was planked in a fore-and-aft direction with long timbers of a uniform thickness. A certain few timbers, however, were thicker, and more robust. These were called wales. Usually there was one down above the waterline, intended to fend off wayward boats. Another was up at the top of the side, intended as a steady rest platform for chaps with muskets. It was called the gunwale.

The masts were supported front and back by ropes called forestays and backstays. and from side to side by ropes call stays singularly, but when grouped together were called shrouds. The shrouds provided by far the highest percentage of support for the mast.

As I’m sure you know, the mast wasn’t fixed to the ship. There was truly no way to bolt it to the fabric of the ship. Instead, the mast was lowered using another vessel called a masting shear, through the ship’s decks, down and down until it rested on the keel. Wedges were driven in the deck holes through which it passed to hold it place, but they weren’t very strong, and could come out. The mast was held down against the keel by the shrouds.

The shrouds stretched from the top – the maintop, foretop, etc – down to the side of the ship. To protect the ropes from the gunwale, a stout wooden plank extended from the hull as a standoff. This plank was called the chainwale.

And it was called the chainwale, often shortened to channel, because the ends of the individual stays in the shroud were chained to the hull to keep them from coming loose.

Man, that was a long way to get around to explaining that, just like the deck planking and the tops, Popsicle sticks once again provided the material for the Black Falcon‘s chainwales.

In my novel The Diary of Phineas Caswell, our eponymous young protagonist spends quite a bit of time sitting out on the mainmast chainwale, so it was important for me to create these correctly. Although it’s a circuitous way to sell a book, these chainwales provide a pleasant link between the fictitious plastic Black Falcon and the fictitious Kathryn B.

The chainwales molded into the Black Falcon’s sides were quite shallow – although that’s a subjective term as the model had no real scale – and, to make it easier both to mold and build, the chains were molded as solid triangles! It looked kinda cool, like those tract houses from the 50’s that had Dutch-style gingerbread to make them look more expensive. But it was wrong. Just wrong.

So, job number one was to sand them off. And that was quite a job.

At first I’d hoped to use the chainplates from the defunct Soleil Royale, but the hole spacing for the shrouds was all wrong, and the plastic was too brittle to work with. Plus, those things were huuuuuge compared to the tiny Black Falcon.

Instead, I used Popsicle sticks, cut in half lengthwise. They had the right amount of heft to hold up to the rigging that was to come.

So, I had a glorious plan to drill micro-sized holes near the outside edge of the wale, and then actually and accurately rig a shroud from the hull to the top. Ideally, the shroud would connect below the chainwale, pass up through the chainwale, through the deadeyes, up the top and over the mast, back down the other side, through the deadeyes, the other chainwale, and back into the hull. And I’m certain there is a modeler that has done that.

Not this one.

I drilled the holes near the outer rim of the wale, but, given my mediocre attention span, didn’t quite make them straight. Rats. The deadeye assemblies, you can read about those here, went on instead, eyeballed, glued either into the hole, or directly to the chainwale where the hole ought to have been.

A tiny stretch of 28 gauge wire, jabbed into a pre-drilled hole in the hull, provides the chain. They’re bent underneath the wale, and come up close to where they would realistically extend to the deadeye.

Of course, the plastic Black Falcon had gross shroud/deadeye combo things that fit into a notch in the chainwale, and, man did that make life easy!

These may look more accurate than the plastic wales, and they may be somewhat more accurate. Most important for me, of course, is that they are wide enough for fictitious Phineas to hide away upon. Oh, wait, that was the Kathryn B

Tales of the Black Falcon is part of the John D Reinhart content family. Writer, illustrator, videographer, and accidental filmmaker — find the whole story at JohnDReinhart.com.

©2026 John D Reinhart/TalesOfTheBlackFalcon.com – all rights reserved

How to Make Paper Sails

Paper sails for a model ship sound simple. They are not simple. Here’s the method that actually works — and an honest account of the parts that still don’t.

When we were younger, it was okay to cut a piece of copier paper to the right size and plastic-cement it to the ship’s yard. The cement soaked into the paper and made a pretty good bond.

Boy, has THAT ship sailed.

It turns out to be not so very hard to make realistic looking paper sails. This is a technique I read about on modelshipworld.com. Although the author of that post did a much better job than I did, his idea works pretty well. Read his post – it’s really good.

Assembly

Rather than use a single piece to replicate the sail, the idea is to cut long strips (1) and glue them together with a slight overlap. In the illustration the edge is staggered to show you the method, but of course you would make them straight.

The Black Falcon is roughly HO scale, or 1/87, so the sail panels shouldn’t be terribly wide. Mine were cut to 1/2 inch.

Gluing the strips together is a messy proposition. I tried a bunch of different methods, most of which turned out pretty bad. The best results came with a glue stick applied to both edges of the panels. Gluing only one panel turned out kind of like a Post-It note. Controlling the glue stick is very difficult, especially if you’re naturally sloppy like me, and the glue gets everywhere.

But these aren’t new sails, right? I mean, look at that color, right? So it’s okay if they’re just a little sloppy, right?

To make the border of the sail, I cut some strips at half-width, or a quarter of an inch. I then folded those in half lengthwise (2), applied glue stick glue inside the fold and to the border of the sail, and stuck ’em down.

This is the main tops’l, in a not-quite-so-finished state. You can see the overlapped strips, and the folded border pieces.

Stressing

No, this isn’t about stressing out over how to make the sails. This a method of working the paper to make it more pliable and cloth-like.

Remember when you made treasure maps as a kid and you worked the paper over the edge of a table to make it seem more like parchment or cloth?

The same method comes in really handy here. Stress the crackers out of your assembled sail by working it between your fingers, by dragging it over the edge of a table, and by wrinkling it and unwrinkling it. Each time you do it, the paper gets softer and picks up more grain.

However, you’re going to stress the joints between the panels, and they’ll probably come unglued.

Don’t come unglued yourself, just stick them back together and keep going.

Furling

Furling your sails – rolling them up to the yards – is a surprisingly difficult challenge with paper sails. The paper is much thicker than the canvas it replicates, and a rolled-up full-sized paper sail looks stupid with two o’s.

Trim the bottom edge of the sail to get rid of the material, and then roll/fold it under to look somewhat furled. The joints in the paper don’t like to roll, so it takes some patience, but you can eventually achieve a pretty good furled-sail shape. Pretty good. I haven’t yet found the combination of stressed paper, cut edge, and rolling that really works.

Painting

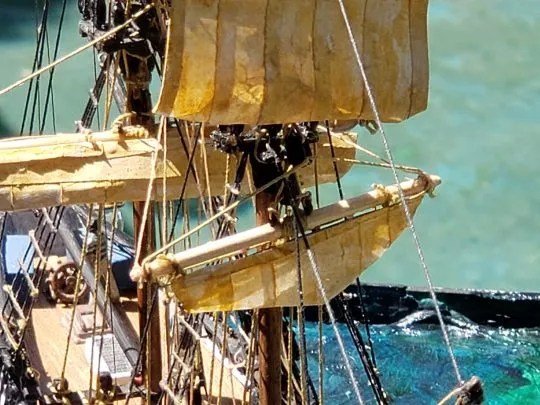
To keep them from looking like they were cut from a Dixie Cup, you’ll need to paint your sails. The one in the close-up picture has been roughly painted with a mix of umber and white acrylics, rather thinned down to avoid a uniform finish. Clearly I need to finish the paint job.

But you can see how the paint darkens the seams between the panels, adding a ton of depth and detail to the sails.

Attachment

There be’s another post on this site that talks about making yards, and suspending a wire underneath. You doesn’t tie yer sail directly to the yard, ye see (oh, now you’ve got me talking like a pirate.) There’s a rail, called a jackstay, that runs the length of the yard, and is the place to which the sail attaches.

The gentleman who wrote the article linked above tied his sails down. That’s easy if you’re energetic and have only the one, big, fore-and-aft sail in his article. If you’re lazy like me, your sail is glued to this rail, rather than tied. Super-glued, so that it doesn’t come loose.

That being said, my fore course has come somewhat loose in the main picture for this post. Rats.

Tales of the Black Falcon is part of the John D Reinhart content family. Writer, illustrator, videographer, and accidental filmmaker — find the whole story at JohnDReinhart.com.

©2026 John D Reinhart/TalesOfTheBlackFalcon.com – all rights reserved

Made a Simple Yard

Making tapered yards from dowels with a power drill. Rigging jackstays from wire. Hanging sails without gluing them to the yard. And why the yards hang akimbo. That’s the story and he’s sticking with it.

In my reworking of the Atlantis Black Falcon plastic model sailing ship kit, I opted to eject the strange, lumpy plastic yards.

The first question is a critical one: from what do you make the yards? That’s a big question. 

The lower yards for the Black Falcon came from the smallest dowel I could find – perhaps 1/8th inch. Of course the dowel is straight cut with no taper, which won’t do for the elegantly shaped yards.

Try this: cut your dowel a little longer than you need. Chuck it into your power drill. That’s right, your power drill.

Fold a piece of sandpaper into a vee you can hold comfortably in your hand.

Hold the vee against the other end of the dowel, and turn the drill slowly. You can use your fingers to shape the taper.

Don’t be too agressive or you’ll break the dowel. I broke a lot of them.

This method relies on your eyeball to accomplish it, as only you will be able to see the right degree of taper, but you can do it.

In Frank Mastini’s  excellent book Ship Modeling Simplified, he details a number of different yards. I highly recommend this book as both a great reference and a generally good read. If  you’re into modeling. Ships.

This rough drawing is the plan for my yards. The woolding doesn’t do anything except look cool. The lift rings are eyebolts from the Soleil Royale kit.

My Jack stay hangs a little close to the yard.

So, let’s talk about that jackstay. It’s another piece of 28 gauge wire, straight, but with a 90 degree bend at each end. I attempted to drill a hole into the yard to accommodate the wire, but ended up drilling through the yard each time. As a consequence, the distance between the yard and the jackstay is, let us say, adjustable.

This Black Falcon features fancy quasi-furled paper sails. In her time, the sails were most usually tied directly to the yard. I made the sails with a nice thick top border, but there is no way to tie it to the yard in that tiny scale.

You’ve been to those nautical gift stores where they sell those wooden models of the Constitution that are made by people  who’ve scarcely seen the sea, let alone a sailing ship? Big, garish chunks of wood slathered with paint and perky, preprinted sails tied on with tan thread the scale size of a sewer line. No, sir, not on my ship. No thank you.

I know what you’re thinking – the jackstays belong to a more modern ship than this little beast that doesn’t even sport topgallants. You are correct, my friend. I quite agree. But, there’s a reason…

A long time ago, on one of my earliest attempts at the then-Aurora Black Falcon, I glued simple typing-paper sails to the yards. Although I was in high school, the sails would have embarrassed a six year old.  It happened that the very girl for whom I would have given my thumbs chanced to see the ship, and said “isn’t that kind of Mick…?” as in Mickey Mouse. Never again, I swore. Never will I glue a sail to a yard.

So, how about gluing them to these snappy jackstays! Now you’re cooking!

The footropes are tied at the ends of the yard, but the other support lines are only glued to the yard. As they’re not sails, I didn’t break my vow.

The yards are lifted into position by two sets of lifting lines. One set ties off at the lift rings, rises up through a single heavy block below the top, and drops down to a functional pinrail at the base of the mast.

The second set lifts the yards from the arms. These also rise to a single block, and drop down to the same pinrail, but, as the single block is above the top, and the lines come in from the yardarms, you get that distinctive triangular shape to the rigging.

Once I got the yards suspended – and they actually hang only on those four lines – I realized, uh oh, they actually hang on only those four lines! I forgot to add any kind of apparatus to tie them to the mast! More research needed on that one, I’m afraid.

With the yard suspended in place, and the standing rigging for the mast already in place, there is no way to convincingly insert a physical device onto the yard. Neither is there a way to tie the yard to the mast that doesn’t result in a big, ugly granny  knot.

My yards hang free.

Mastini suggests rigging the yards before you attach them to the masts, and rigging the mast before you attach it to the ship. That is a fantastic idea, and one which I will certainly use in the future!

But the Black Falcon lies at anchor in the lagoon of a lovely tropical island somewhere. Her men lounge about the deck, resting and readying for their next voyage, while her boat returns with a cask of fresh water. The yards hang akimbo because there’s no need to expend the effort to set them straight.

That’s my story, and I’m sticking with it.

Tales of the Black Falcon is part of the John D Reinhart content family. Writer, illustrator, videographer, and accidental filmmaker — find the whole story at JohnDReinhart.com.

©2026 John D Reinhart/TalesOfTheBlackFalcon.com – all rights reserved

Easily Make Deadeyes

Deadeyes are excruciatingly fiddly at 1/87 scale. Wire, CA glue, and a consistent bend solve the problem — and produce deadeyes that are at least more convincing than the plastic ones. Probably.

A quick word on deadeyes: these were sets of two wooden, three-hole blocks, or actually just a wooden disk with three holes drilled through it. One block was tied to the end of a rope, called a stay, that led up to the mast’s top, while the other was chained to the ship’s side. Between the two blocks was laced another length of rope, woven through the three sets of holes. The knot in this rope could be adjusted, to the effect of tightening or slackening the stay.

The stay, when ganged together with other stays, were called shrouds. The shrouds kept the mast straight from side-to-side, and provided some fore-and-aft support as well.

The Atlantis Black Falcon kit comes with some molded plastic shrouds that are heavy and about twenty times thicker than the ropes they’re supposed to represent. The deadeyes at the bottom are so vague as to be unrecognizable

If you plan on replacing those shrouds, you’ll have to replace the deadeyes, too.

If you’ve ever rigged your own deadeye assemblies, you know they can be excruciatingly difficult. Especially on smaller scale models like the Black Falcon, the little fiddly bits are excessively fiddly.

You could make a jig to hold the two blocks apart, and then carefully wrap them together. The jig needs to place the blocks apart at a scale distance and yet allow you access to both sides and the space between them in order to rig them.

Or you could use wire. Yes, wire. Cut and bent to a standard length, crazy glued to the holes in the blocks, squeezed together, and painted black to simulate a tar coating.

If you use wire instead of thread you can easily rig model deadeye assemblies.

As long as you bend the wire at the same place every time, your deadeyes cannot help but be identical.

The wire deadeye assemblies on the modified Atlantis Black Falcon are out of scale for height, but look more convincing than those in the kit.

Measure the plastic deadeyes carefully. I didn’t, instead eyeballed it, and mine are hugely big. They are, however, more scale looking than the plastic ones. I think. Here on the mainmast they look okay, as if a sailor like that pegleg fellow could leap from the rail and climb the shrouds.

The foremast shrouds on the Atlantis Black Falcon model kit are more scale in appearance, but too tall.

On the foremast, however, heaven help the poor sailorman who must climb into those ratlines!

Tales of the Black Falcon is part of the John D Reinhart content family. Writer, illustrator, videographer, and accidental filmmaker — find the whole story at JohnDReinhart.com.

©2026 John D Reinhart/TalesOfTheBlackFalcon.com – all rights reserved

Scratchbuild Stern Windows

The Black Falcon’s transom was flat as a board. Phineas Caswell needed stern windows. A trip to the Lego Store in Glendale solved both problems for about three dollars.

The transom on the original Black Falcon is flat like nobody’s business. Flat, like the design money for designing the kit ran out immediately aft of the ship’s wheel.

In my novel The Diary of Phineas Caswell, the 12-year-old protagonist spends quite a bit of time in the aft cabin of the Kathryn B, a merchant brig rather based on Aurora’s Black Falcon model kit. Except that the Kathryn B had big windows across her stern, not the boarded up, sterile transom of the Black Falcon.

One evening I found myself in the Lego Store in the Glendale Galleria, a massive, three-story mall built in a time when those were the wave of the future, rather than the brick-and-mortar reminders of who we once were.

In that Lego store, you could buy oodles of individual parts. I picked up a tub of their little gold-colored castle windows, thinking that someday, someday I would find a use for them.

Yes, they’re ugly, and a little cockeyed. Kind of adds to the charm? Maybe?

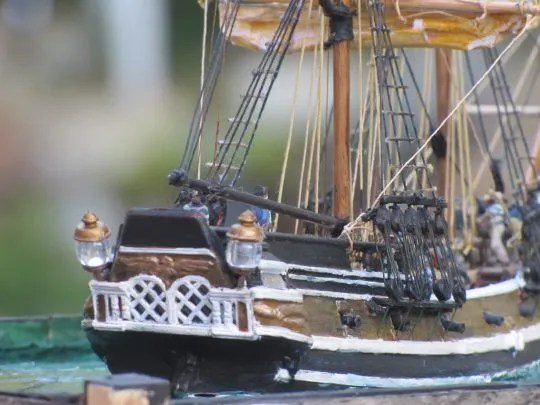
In the day, say the early 1700’s, plate glass was virtually non-existent. Glass that was affordable for shipwrights, shop owners, and the small tavern came in little shards and pieces. Thus, the stern windows would have been mullioned affairs. Even so, each of the panes in the Black Falcon‘s windows would be around 18×18 inches – not cheap.

As long as we’re looking astern, the corner pieces hide my crude craftsmanship at the corners of the original transom. They come from the ends of a balcony on the Soleil Royale.

The stern lanterns came from a Lindberg’s Captain Kidd Pirate Ship kit. If you hack away the brown plastic lantern lens and replace it with a craft bead, it looks pretty cool. Those hide the crummy craftsmanship of the balconies.

So, there you have it. A super easy, super quick modification, all thanks to Legos. Thanks, Lego!

Tales of the Black Falcon is part of the John D Reinhart content family. Writer, illustrator, videographer, and accidental filmmaker — find the whole story at JohnDReinhart.com.

©2026 John D Reinhart/TalesOfTheBlackFalcon.com – all rights reserved

Make Great Grates

Need a scale grating for your model ship and don’t want to go mad? Plastic canvas from the craft store solves the problem for about two dollars and fifteen minutes of your time.

If you’re lazy like me, and you build model ships, and you need to cover a hole in your deck, you know how difficult it is to find a material for your gratings.

If you don’t know, your gratings are your wooden covers for some of the openings in your deck. You could have a solid wooden cover, or maybe a solid wooden hatch with hinges and a lifting ring. But, if you want to allow air and light through the hole, but not the occasional sailor, you install a wooden lattice work, called a grating.

Gratings are easy in large scale models: you simply assemble very small pieces of wood into a grid pattern. Or you could buy a lattice-work kit for your scale.

But scratchbuilding a lattice grating in 1/87th scale? It’s a road to madness.

However.

Plastic canvas. Roughly a hundred years ago, my ex-wife had this passion for making sculptural yarn works – puppy dogs, kitchen witches, toilet brush holders, etc. They were hideous. But, to provide the structure for the yarn, she bought tons of plastic canvas.

A hideously cute tissue box cover made of yard sewn over plastic canvas.

Plastic canvas is made of a slimy vinyl, and comes in a variety of different grid sizes, from tiny to huge, solely for the purpose of making hideously cute yarn and string… things.

It’s super cheap, and easy to find both online and at your local arts and crafts store.

And, in the smallest size, makes a nice grating.

Although hard to see, the grossly out of scale Atlantis Black Falcon staircase leads right to a cannon.

In this case, the original Black Falcon deck had a staircase that led you right down to a cannon. The staircase was supposed to be a ladder, but, due to molding limitations of the day, was filled in underneath, making it more of a staircase. Regardless, the thing was fantastically out of scale with the rest of the ship. Look at that tiny boat, lying over the grossly-out-of-scale grating. If the guy was scaled for the stairs, the holes in the grating would be a yard square. If he was scaled for the grating, the step risers would be, like, three inches. In either case, the lovely little boat is just wrong.

Bumping the ladder up to an appropriate size brought it down right on top of the gun – clearly an untenable situation.

A revised companion ladder is made of a 1/100 scale ladder from Heller's Soleil Royale and a plastic canvas grating.

Instead, our ship now has a little bridge over the gun. You can see the gun carriage sticking out under the bridge. It’s a little cramped for that gun crew, but with the open rungs of the ladder and the grating overhead, at least there’s some place for the gun’s smoke to go. Rather than build two ladders, which would be awkward but would replace the two staircases in the kit, I chose to eliminate the starboard ladder and modify the one to port.

Like the grating over the opening in the main deck, I used plastic canvas to simulate the lattice. It’s a trifle thick, but doesn’t detract from the overall appearance.

Just to complete the picture, the ladder, the little railing on the bridge, the pin rails, the deadeye blocks, and the bulkhead behind the ladder all came from Heller’s 1/100 scale Soleil Royale. That is a lovely kit, but so inaccurate – not just to the ship, but to history itself – as to be scarce worth the time and work to build it. Okay. I’m lazy.

And, yes, that is a splice in the main brace you see right above the cannon in the middle of the shot. But the Popsicle-stick decks look nice…

Tales of the Black Falcon is part of the John D Reinhart content family. Writer, illustrator, videographer, and accidental filmmaker — find the whole story at JohnDReinhart.com.

©2026 John D Reinhart/TalesOfTheBlackFalcon.com – all rights reserved